We're thrilled to bring you the latest updates - and a sneak peek at what's coming next - to help your Shed Business thrive. These enhancements reflect our ongoing commitment to supporting your success.
In this article:
✅ Now Available
- Inline Purlins & Girts
- Spread Column (Rectangular) Footings
- 3D Online Designer Fields Customisation
- Automatic Block Boundaries for QLD
- New User Permission: Instant Quoting
- Advanced Filters and Search Bar for Drafts and Jobs
- Sheet Size Selection when exporting Quotation Plans
- Wall Fly Bracing
⏭️ Upcoming Releases
- Engineering Optimised Calculations for IL1 & IL2 - Wind Regions A and B. (currently in Beta)
Visualise Insulation on 3D Designs for more design precision, including roll overlaps and non-insulated areas.
Access to some updates may vary based on your Shedmate Service Plan.
➡️ Inline Purlins & Girts
Inline Purlins and Girts are now fully supported in Shedmate!
If your Shed Business uses this structural option, you'll benefit from improved pricing accuracy and enhanced design flexibility, making quoting and engineering even more efficient.
You can enable this feature via the "Structure" menu, under the "Girts and Purlins" section:


Please note that the Fascia to Fascia Width of the shed and height of columns will remain the same, while top height and grid width are adjusted to accommodate structure changes.
Another option available is the "Offset Mullions With Girts". When enabled, Shedmate will automatically adjust the mullion position slightly to prevent any overlap with the internal girts:
| "Offset Mullions With Girts" option disabled | "Offset Mullions With Girts" option enabled |
 |
 |
➡️ Spread Column (Rectangular) Footings
Shedmate now supports Spread Column (Rectangular) Footings. You can enable Rectangular Footings on a specific Shed Project by:
- Selecting any Footing in your Shed Model and ticking the "Rectangular Footings" option:

- By going to Structure Menu > Footings Section, and ticking the "Rectangular Footings" option:

Once enabled, you can modify the Height, Width, and Depth of any Rectangular Footings, either in a group or individually, by selecting "Change Individual Footing."
Another available option worth mentioning is the "Align with Slab":
Depending on your Engineering needs, Shedmate can adjust Footings as per below:
| "Align with Slab" option enabled | "Align with Slab" option disabled |
 |
 |
➡️ 3D Online Designer Fields Customisation
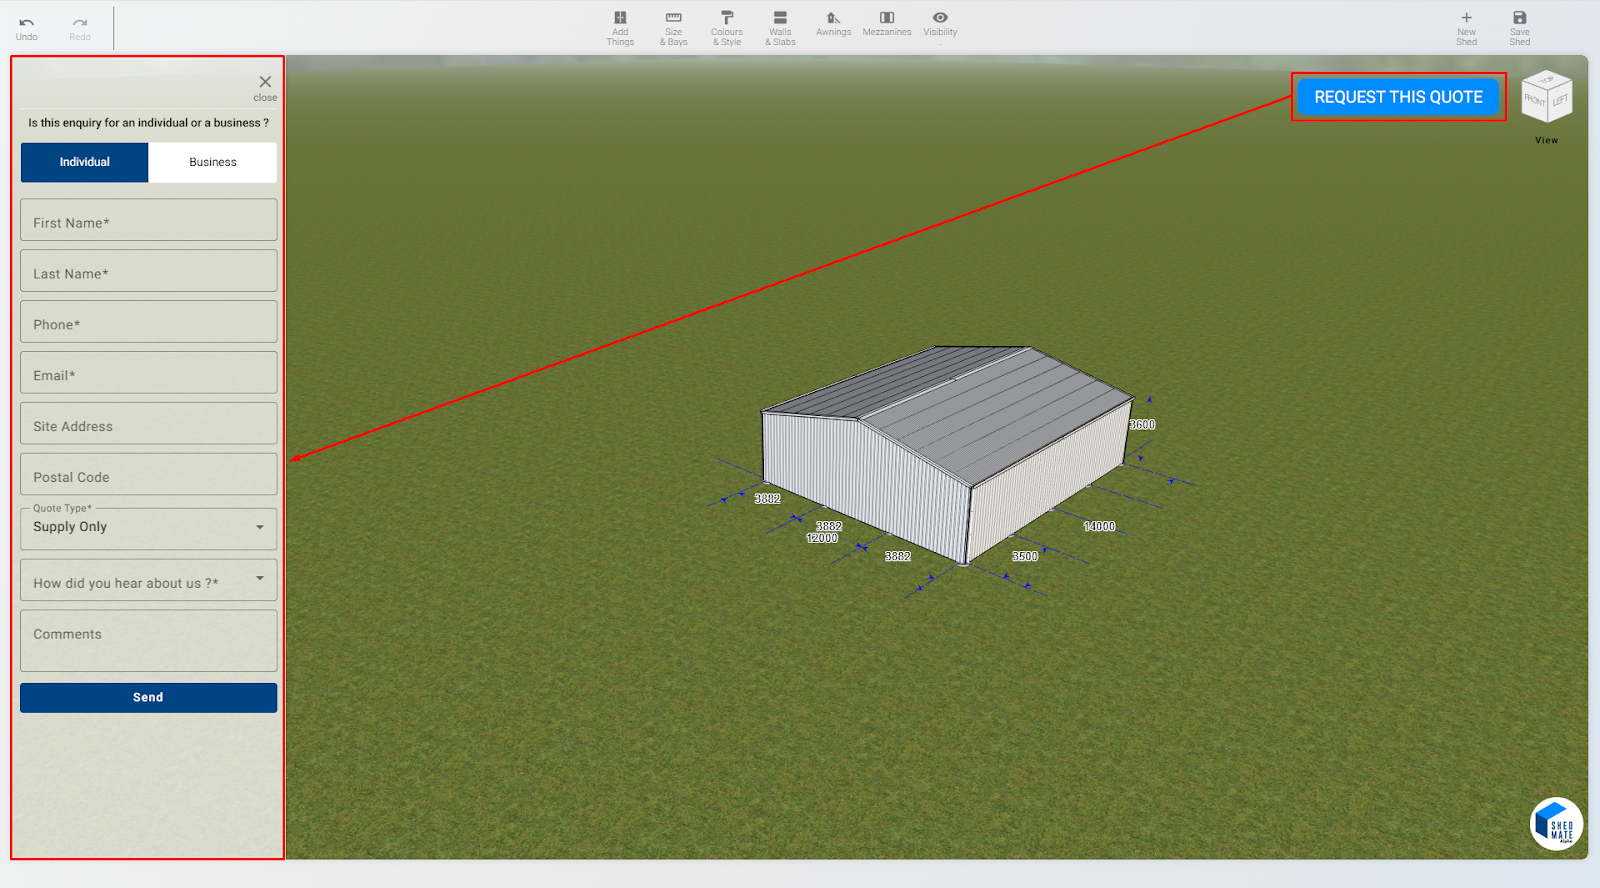
The 3D Online Designer fields can now be customised to suit your Shed Business requirements. All fields, except First and Last Name, can be removed, edited, or replaced with new ones following the rules below.
- The available options for fields are:
- Checkboxes (checked or unchecked);
- Dropdowns;
- Text.
- All fields can:
- Be set as Required / Not Required;
- Have a default option (e.g. South Australia could be selected as a default State);
- Not Visible (usually to set a default option that can't be changed).
If you would like to customise the information you request from your Customers prior to their Quote Request, please email us at support@shedmate.com.au.
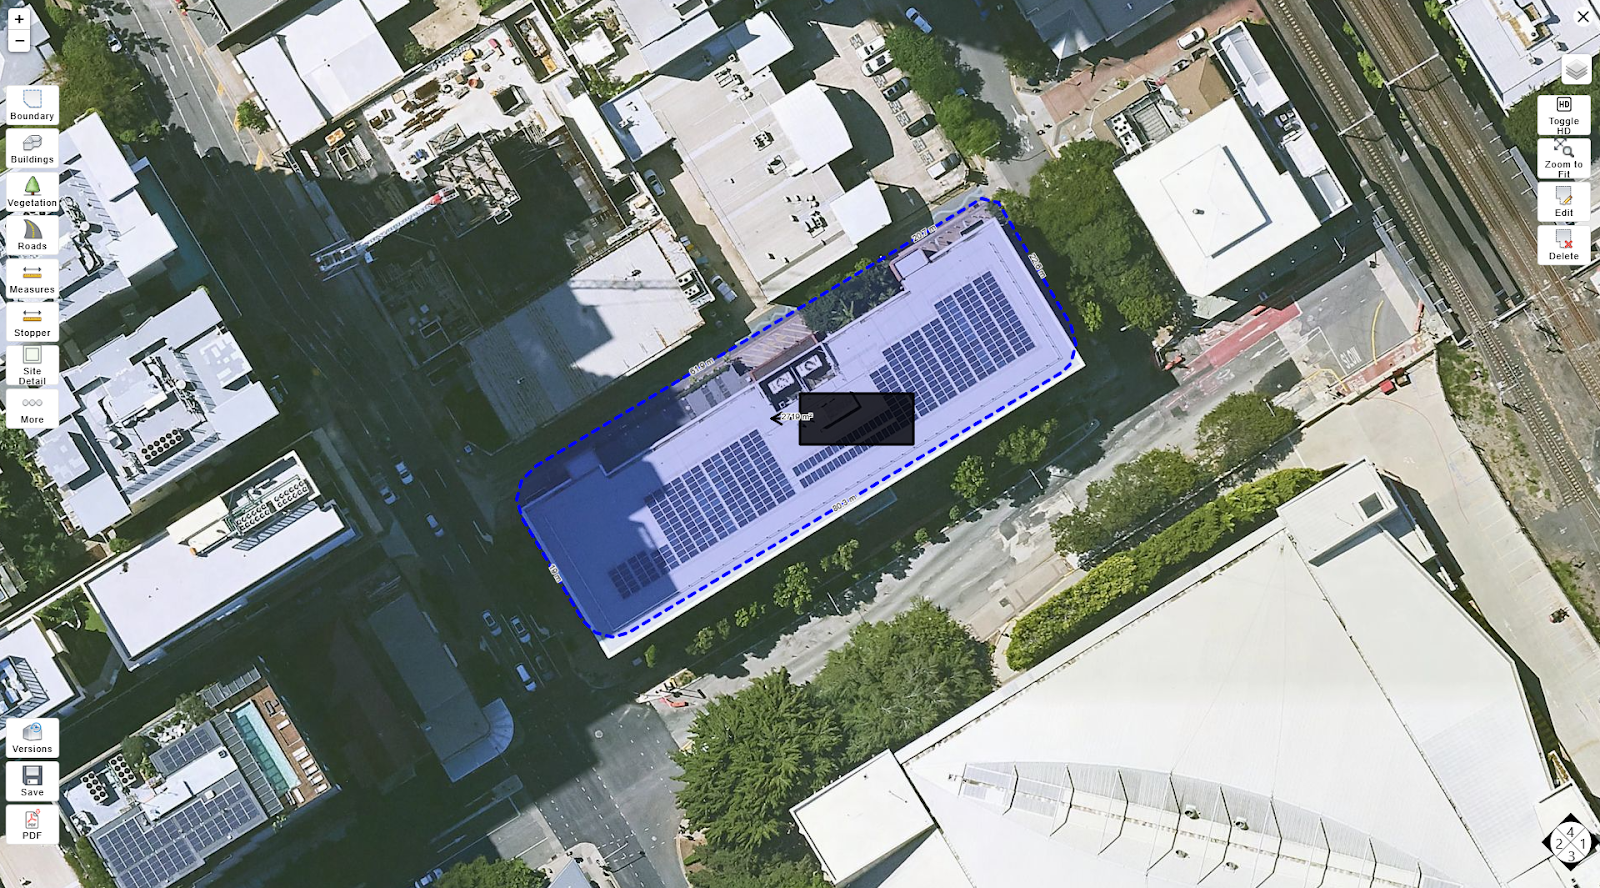
➡️ Automatic Block Boundaries for QLD
Shedmate now supports Automatic Block Boundaries for QLD, making designing a Site Plan much easier.
As long as you have access to the Site Plan Module, this Feature can already be used in your Environment by following the steps below:
- Open the Site Plan Module:

- In the Full Address field, start typing the Site Address. As you type, Shedmate will search for matching Addresses and suggest options:

- Select the correct Address to populate the Form automatically:

- Hit the "Save" button, in the upper-right corner, and Shedmate will automatically draw the Block Boundaries of the selected Address for you:
- Now you can proceed with editing the Site Plan.
To ensure Automatic Block Boundaries works properly, avoid manually filling out the Address fields. Instead, start typing in the Full Address field and select the option suggested by Shedmate.
Shedmate now supports Automatic Block Boundaries for all the states below:
- South Australia;
- Victoria;
- New South Wales;
- Queensland.
➡️ New User Permission: Instant Quoting
Company Admins can now control which Users can access the Instant Quoting Module. Enabled by default for all Users within a Company, the Instant Quoting can now be hidden from some Users following the steps below:
- In the "Settings" Menu, click on "Edit user permissions":

- You will now see the Instant Quoting option when creating or editing a Permission Level. Tick/untick this option to enable/disable the Instant Quoting Module for all Users assigned to that Permission Level:

The Instant Quoting Feature is enabled by default for all Users. Please review your Permission Levels to ensure only the appropriate Users can access specific features.
➡️ Advanced Filters and Search Bar for Drafts and Jobs
Shedmate’s new Search Bar and Filters make it easier than ever to find exactly what you're looking for:

✅ Standard Search Options
You can now quickly search using key fields such as:
- Job Number (Draft or Project Name)
- Client / Company Name
- Created By
🔎 Advanced Filters
Take your search even further with Advanced Filters, allowing you to filter results by:
- Tags
- Job Type
🗂️ Archived Items
➡️ Sheet Size Selection when exporting Quotation Plans
The Sheet Size Selection feature—previously available for Arch Plan exports—is now also available when exporting Quotation Plans:


If you're experiencing issues with larger sheds not fitting properly when exporting Quotation Plans, simply choose a larger Sheet Size during export to ensure optimal formatting and readability.
➡️ Wall Fly Bracing
You can now add Wall Fly Braces to your shed designs in Shedmate. This option is located in the "Structure" menu, under the "Roof Structure" section:


How to Enable:
- First, tick "Enable Fly Bracings".
- Once enabled, the option "Enable Wall Fly Bracings" will appear - tick it as well.
Configuration Options:
To control how Wall Fly Braces are placed, you can adjust the following settings:
- Wall Bracings Max Spacing – defines the maximum spacing between braces;
- Skip First Girt Set – use this to exclude the first girt from bracing, if needed.
🚀 That’s a Wrap for March!
We hope these updates help streamline your workflow, enhance design accuracy, and give your team more control and flexibility when using Shedmate.
As always, your feedback drives our innovation, so if you have suggestions or questions about any of these new features, don’t hesitate to contact us at support@shedmate.com.au.
Stay tuned for even more exciting improvements in the coming weeks—our team is working on powerful new tools to help your shed business succeed.
Thanks for being a valued part of the Shedmate community!